常规的springboot打包后,只生成一个jar包,配置文件和所有依赖包都在一起,当有一点点改动,上线时需要把整个包发布上去,有些不太方便。
pom.xml配置
<?xml version="1.0" encoding="UTF-8"?> <project xmlns="http://maven.apache.org/POM/4.0.0" xmlns:xsi="http://www.w3.org/2001/XMLSchema-instance" xsi:schemaLocation="http://maven.apache.org/POM/4.0.0 http://maven.apache.org/xsd/maven-4.0.0.xsd"> <modelVersion>4.0.0</modelVersion> <parent> <groupId>org.springframework.boot</groupId> <artifactId>spring-boot-starter-parent</artifactId> <version>2.0.6.RELEASE</version> <relativePath /> <!-- lookup parent from repository --> </parent> <groupId>com.mei.dubbo</groupId> <artifactId>SpringBootPackageTest</artifactId> <version>0.0.1</version> <name>SpringBootPackageTest</name> <properties> <java.version>1.8</java.version> </properties> <dependencies> <dependency> <groupId>org.springframework.boot</groupId> <artifactId>spring-boot-starter-web</artifactId> </dependency> <dependency> <groupId>org.springframework.boot</groupId> <artifactId>spring-boot-devtools</artifactId> <scope>runtime</scope> <optional>true</optional> </dependency> <dependency> <groupId>org.springframework.boot</groupId> <artifactId>spring-boot-starter-test</artifactId> <scope>test</scope> </dependency> </dependencies> <build> <plugins> <plugin> <groupId>org.apache.maven.plugins</groupId> <artifactId>maven-jar-plugin</artifactId> <configuration> <!-- 去除resources下的所有文件 --> <excludes> <exclude>**/*.properties</exclude> <exclude>**/*.xml</exclude> <exclude>**/*.yml</exclude> <exclude>static/**</exclude> <exclude>templates/**</exclude> </excludes> </configuration> </plugin> <plugin> <groupId>org.springframework.boot</groupId> <artifactId>spring-boot-maven-plugin</artifactId> <configuration> <layout>ZIP</layout> <includes> <!-- 打包时,本jar包不包含其他依赖包 , 否则打出的jar包还是很大 --> <include> <groupId>nothing</groupId> <artifactId>nothing</artifactId> </include> </includes> </configuration> </plugin> <plugin> <artifactId>maven-assembly-plugin</artifactId> <configuration> <descriptors> <!-- 用于复制文件等配置 --> <descriptor>assembly.xml</descriptor> </descriptors> <finalName>${project.artifactId}</finalName> <appendAssemblyId>false</appendAssemblyId> </configuration> <executions> <execution> <phase>package</phase> <goals> <goal>single</goal> </goals> </execution> </executions> </plugin> </plugins> </build> </project>assembly.xml
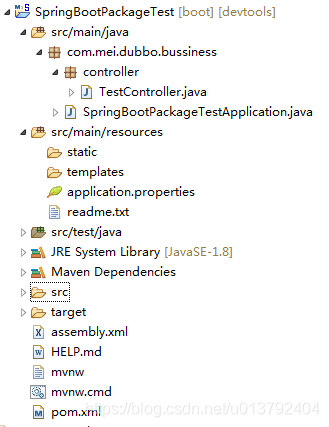
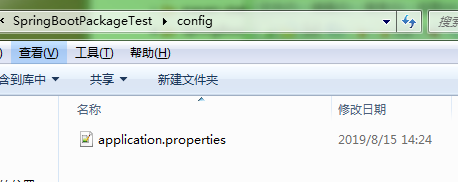
<assembly xmlns="http://maven.apache.org/plugins/maven-assembly-plugin/assembly/1.1.2" xmlns:xsi="http://www.w3.org/2001/XMLSchema-instance" xsi:schemaLocation="http://maven.apache.org/plugins/maven-assembly-plugin/assembly/1.1.2 http://maven.apache.org/xsd/assembly-1.1.2.xsd"> <id>release</id> <includeBaseDirectory>true</includeBaseDirectory> <formats> <!-- 打出包的后缀, xxxx.tar.gz --> <format>tar.gz</format> <format>dir</format> </formats> <fileSets> <fileSet> <directory>target/classes</directory> <outputDirectory>config</outputDirectory> <includes> <include>*.yml</include> <include>*.xml</include> <include>*.properties</include> </includes> </fileSet> <fileSet> <directory>target/classes</directory> <outputDirectory>resources</outputDirectory> <includes> <include>static/**</include> <include>templates/**</include> </includes> </fileSet> </fileSets> <dependencySets> <dependencySet> <!-- 将项目所有依赖包拷贝到发布包的lib目录下 --> <outputDirectory>lib</outputDirectory> <useProjectArtifact>false</useProjectArtifact> </dependencySet> </dependencySets> </assembly>项目结构如下:
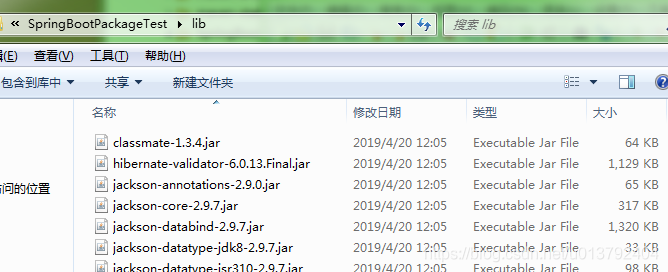
使用eclipse maven install 打包后,结构如下:
tar.gz 包中没有SpringBootPackageTest-0.0.1.jar包, 解压SpringBootPackageTest-0.0.1.tar.gz后需要手动考进去。


运行: java -Dloader.path=./lib,config -jar SpringBootPackageTest-0.0.1.jar
访问: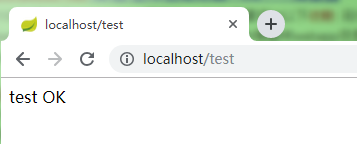
暂时简单测试没问题。这种方式只适合不带页面的后台程序运行(如前后端分离的后端程序),有页面的工程暂时没找到解决方法。
热门文章
- 12月3日|21.6M/S,最新高速免费节点,Clash/SSR/Shadowrocket/V2ray订阅链接地址,科学上网
- 什么平台可以卖账号(什么平台卖账号最安全)
- 11月9日|18.4M/S,最新高速免费节点,Shadowrocket/Clash/V2ray/SSR订阅链接地址,科学上网
- 1月5日|22.8M/S,最新高速免费节点,Shadowrocket/Clash/V2ray/SSR订阅链接地址,科学上网
- 聚类算法——python实现层次聚类(AGNES)
- 1月23日|22.2M/S,最新高速免费节点,Shadowrocket/V2ray/SSR/Clash订阅链接地址,科学上网
- 12月31日|19.6M/S,最新高速免费节点,Shadowrocket/SSR/V2ray/Clash订阅链接地址,科学上网
- 1月17日|18.9M/S,最新高速免费节点,Shadowrocket/Clash/SSR/V2ray订阅链接地址,科学上网
- 11月16日|22M/S,最新高速免费节点,Clash/SSR/Shadowrocket/V2ray订阅链接地址,科学上网
- 宠物粮食品牌前十名排行榜有哪些呢(宠物粮生产厂家排名)